Configure Replication in SQL Server 2012 Step by Step with No Step Skipped

SQL Server replication is a process and technique where data is frequently copied from one database server to another database server. The output or work is distributed across database where relevant data is accessed by users as per their assigned task without disturbing work of other users.
Database replication works like a master and slave technique, when master sends the data to slave, slave updates it’s record and acknowledges to master that it has successfully received the record.
![]()
Microsoft SQL Server has three types of Replication for distributed applications:
– Transactional Replication
– Merge Replication
– Snapshot Replication
Here we are going to discuss about Transactional Replication. In Transactional Replication, snapshot of publication database is maintained and when any data changes occurs at publisher side then same is updated at the subscribers end in very low latency or approximately real time. The order of the data is same with subscriber as with publisher hence consistency is maintained strictly in the process. Note that subscriber acts as read only candidate so any changes made at subscriber side is not propagated and synchronised back to publisher. This technique is used where publisher has very high activity of DML operations.
Major components used in the process.
– Publisher: It is a server which sends data to subscriber(s). It maintains publications and synchronises publisher and subscriber(s).
– Distributor: It is a server which manages data flow requests within replication process.
– Subscriber: It is a server which maintains data provided by publisher and acknowledges back for successful delivery of data.
Now we will see how we can perform Transactional Replication step by step with no step skipped, for that we need to configure publication, distribution and subscription.
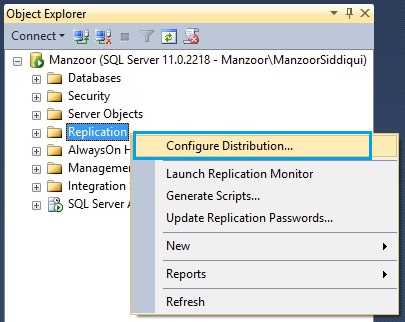
Step 1: Configure Distribution
Go to your Object Explorer where you want to configure distribution server, right click on Replication and select Configure Distribution…
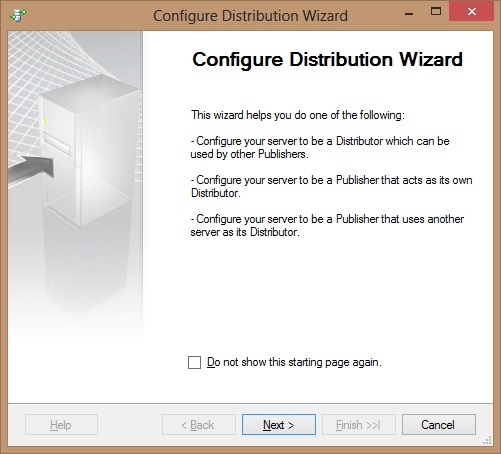
You will get Configure Distribution Wizard where you have to follow given steps. Here you will configure your server to be a Distributor which can be used by other Publishers or configure your server to be a Publisher that acts as it’s own Distributor or you can configure your server to be a Publisher that uses another server as it’s Distributor as per given below wizard. Then click Next button.
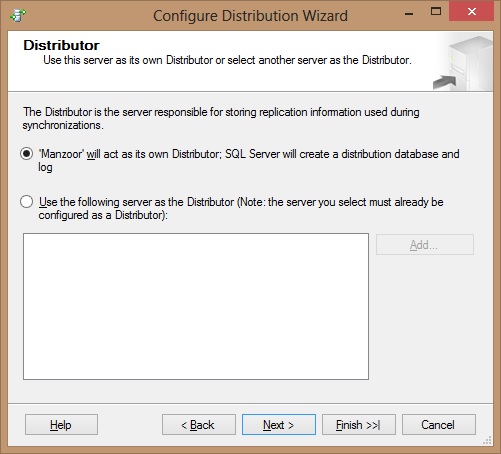
In Distributor step, you have two options where SQL Server will create a distribution database and log or you can choose your own server to act as a Distributor then click Next button.
At Snapshot Folder option, select default path or you can assign your network folder as given below then click Next button.

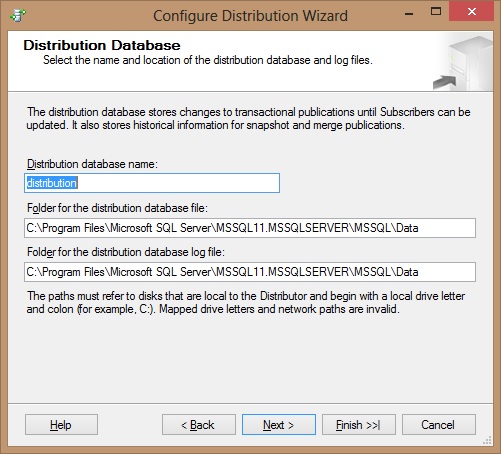
Now select Distribution Database name and folder for database file and log file as given below then click Next button.
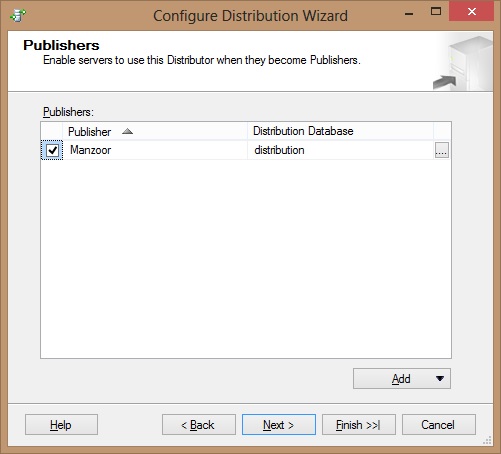
Now select Distribution Database in case of Distributor becomes Publishers so that it can use that database for processing requests. Then click Next button.
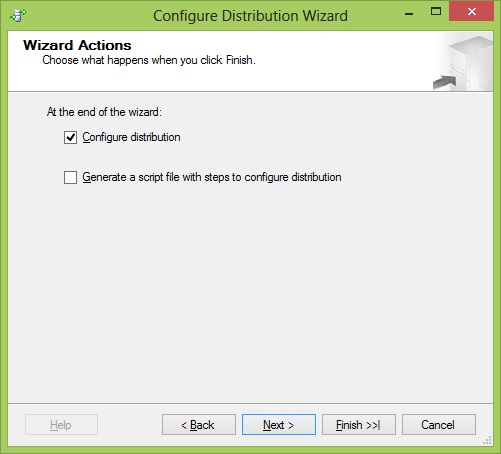
Now tick mark Configure distribution option and click Next button.
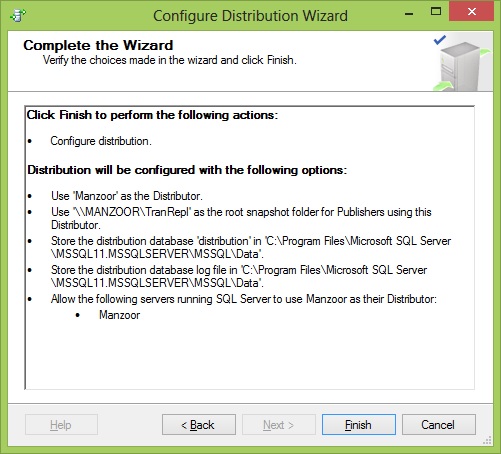
At wizard completion screen, click on Finish button so that it can configure distribution settings as given below.
Once Distributor is configured successfully and Publisher is enabled, you will get status message as given below.

Step 2: Create Publication
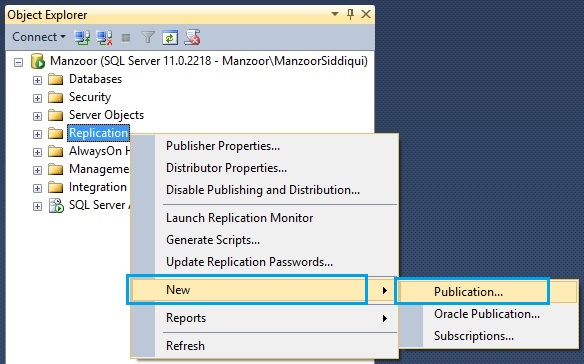
To create new publication, go to Object Explorer, right click on Replication, go to New and select Publication…
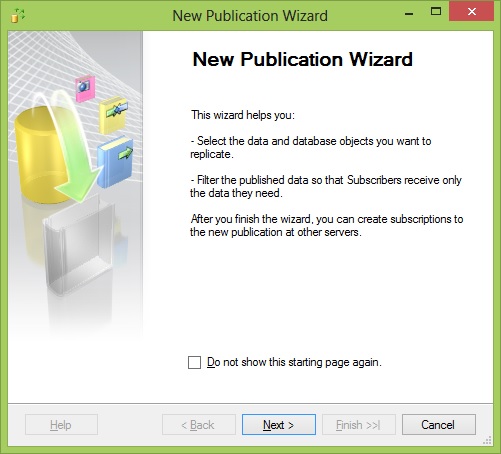
Once you will select Publication, New Publication Wizard will pop up. As given in the screen, publication wizard selects the data and database objects you want to replicate and filters the published data. Continue with Next button.
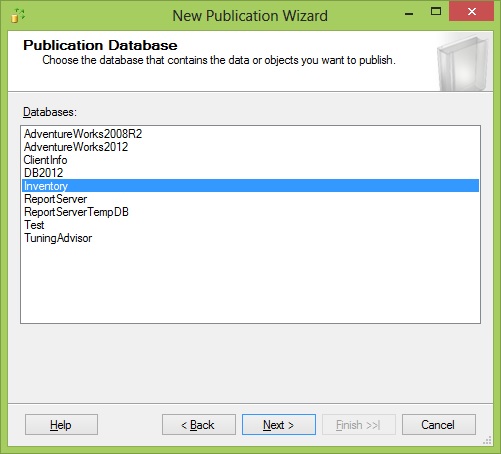
Now you have to select your database for which you want to publish database objects and click Next button.
Now select Publication Type, here you have different types available like Snapshot publication, Transactional publication, Peer-to-Peer publication and Merge publication. As we are configuring Transactional Replication so we will choose Transactional publication and continue with Next.

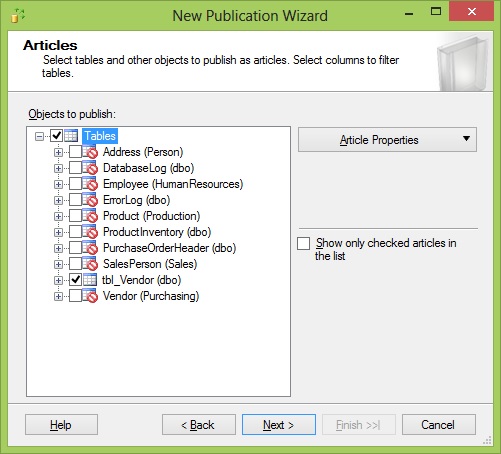
As shown below, here you have to select tables and objects which you want to publish as articles. You can also select specific columns to filter out from tables. Kindly note that you will be able to select only those tables which has primary key otherwise you will not be able to select it and it will display as red symbol on the object.
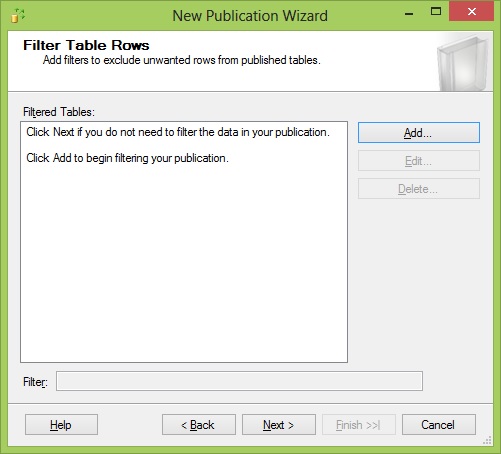
If you want to filter rows in a table(s) then you can choose setting in this wizard from Add button and exclude unwanted records.
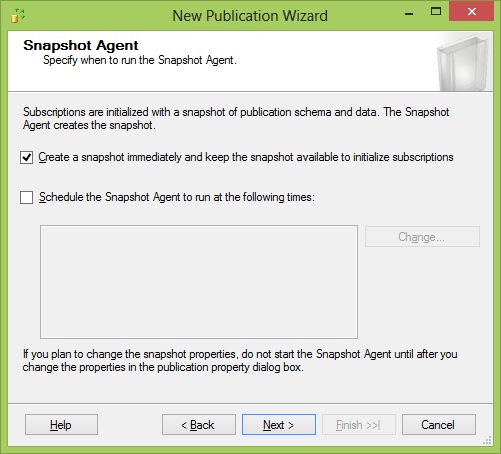
In next window, either you can schedule snapshot agent or create immediately to initialize subscription. Tick mark the required option and click Next button, I am going to create snapshot agent immediately.
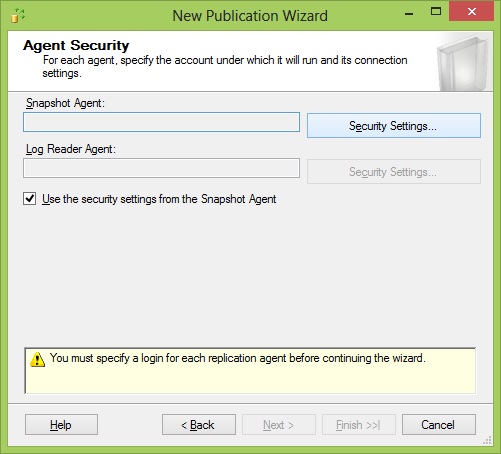
Here you have to click on Security Settings and provide details for snapshot agent and log reader agent. Kindly refer next screen for Security Settings options.
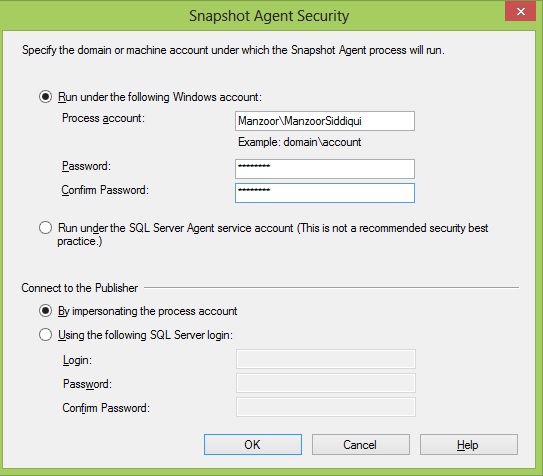
You can provide your domain account and password and connect to publisher by impersonating the process account as shown below then click OK button.
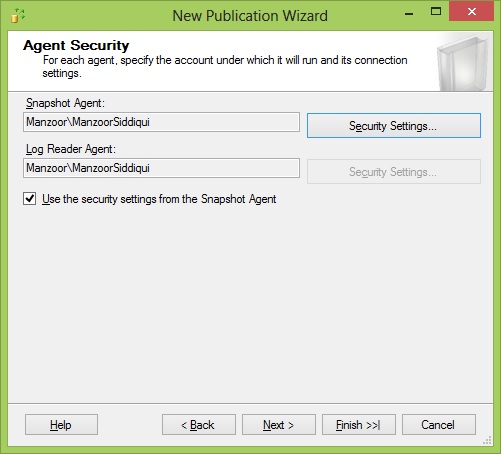
After selecting security details, it will look like as below then click Next button.
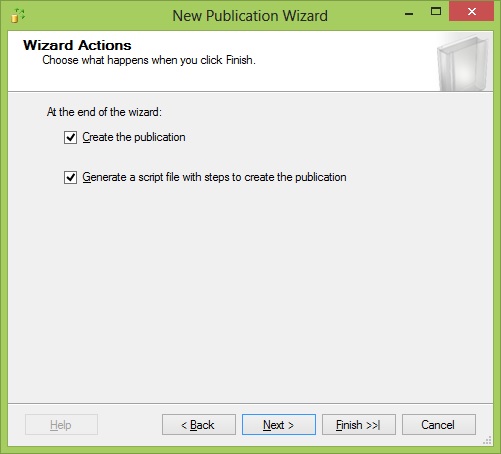
In Wizard Actions, you can choose to create the publication and generate a script file then click on Next button to continue.
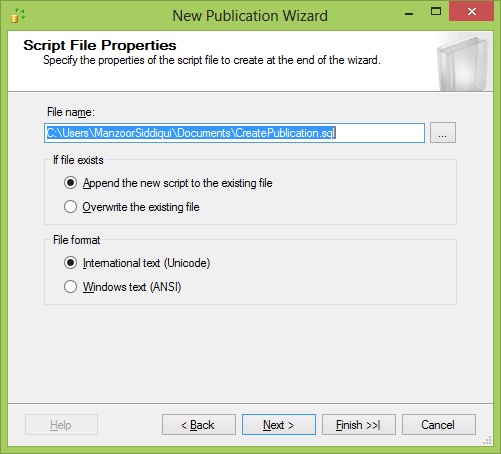
Here you can specify file name and path for script file and select required file format as Unicode or ANSI then continue wizard.
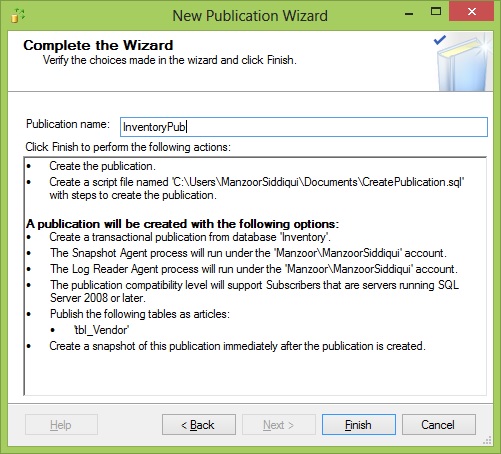
In this step mention publication name and verify the options which we have selected throughout the process before creating and finishing it.
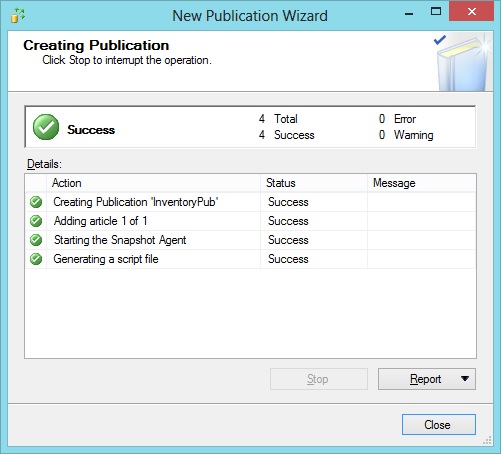
Once you will click Finish button, it will start creating publication and we can see status of all the steps which we have selected. Now new publication has been created and we can close this window.
Step 3: Create Subscription
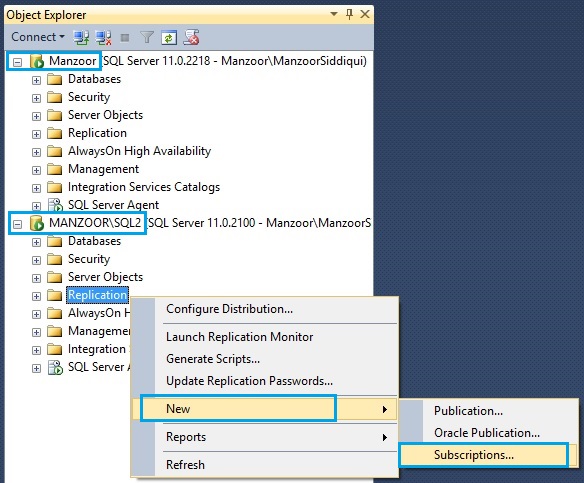
We have created distribution and publication on one server and now we will create subscription on other server which is located at different location or geography, here I have connected another server named as MANZOOR\SQL2 to create subscription. So right click on Replication, go to New and select Subscriptions…
Once you will click Subscriptions… New Subscription Wizard will open where you can create one or more subscriptions and specify when to run the agents. click Next to continue.
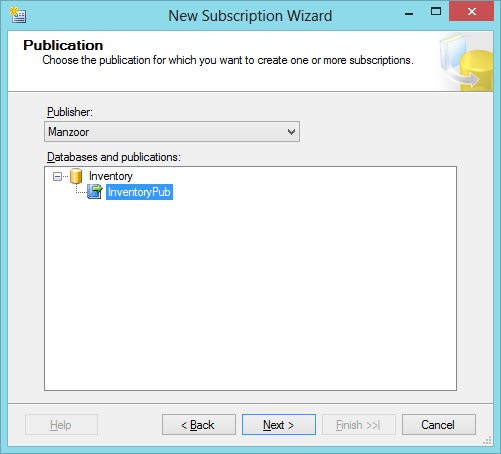
Here, you have to select publisher for which you are creating subscriptions. Here I have selected Manzoor as Publisher. Once selected click Next button.
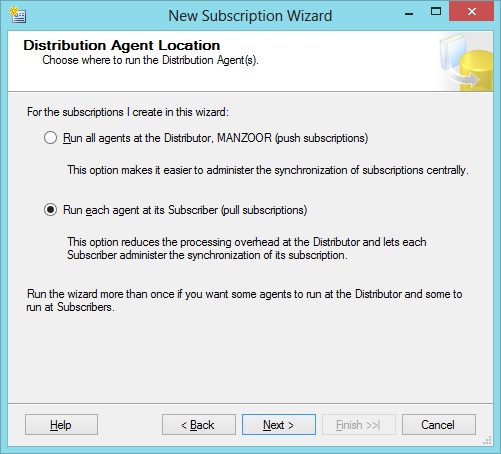
In Distribution Agent Location you can select push subscriptions which will run all agents at the distributor or you can choose pull subscriptions which will run each agent at it’s subscriber. I am selecting pull subscriptions which is default option and click Next button.
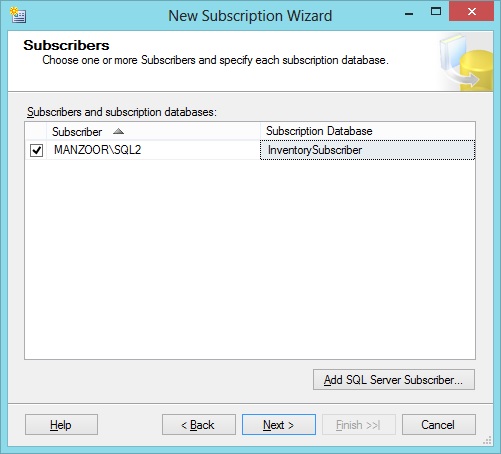
Now here, you have to mention subscriber and subscription database name. I have selected my subscription database named as InventorySubscriber as shown below and continue with Next button.
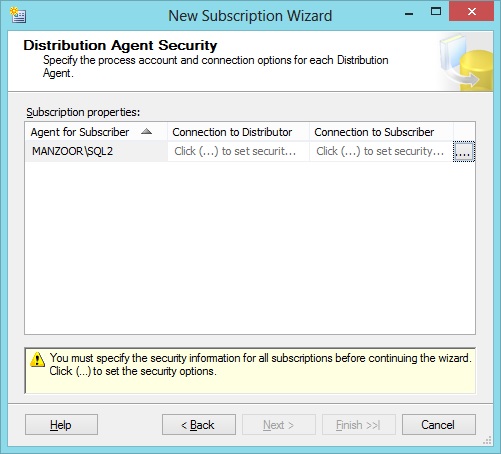
In Distribution Agent Security page, you have to specify the process account and connection options for each distribution agents. You have to click [….] option on the right side of the page
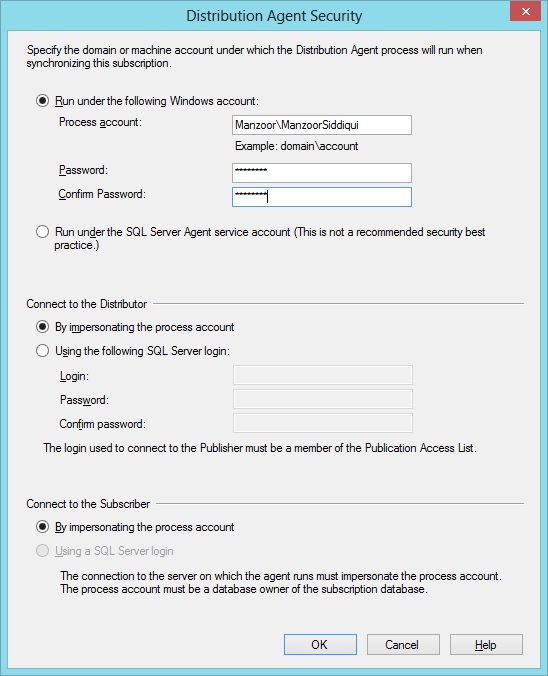
Once Distribution Agents Security page opens, provide the process account and password for it. You can mention your network domain account and password. Here I have mentioned my local domain account Manzoor\ManzoorSiddiqui for demonstration and connect to distributor by impersonating the process account and connect to subscriber by impersonating the process account. Click OK.
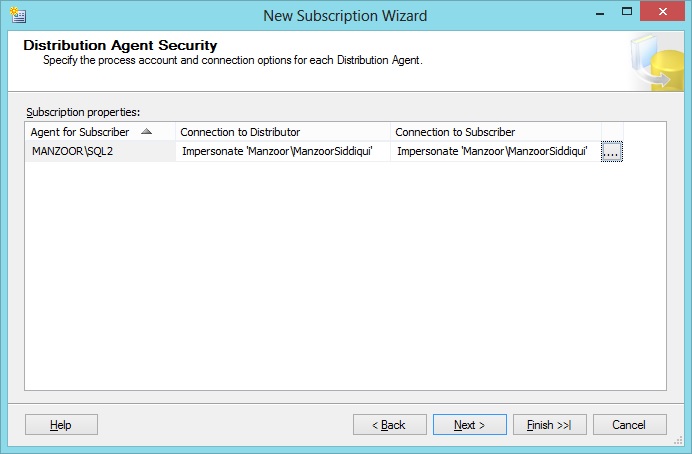
After Distribution Agent Security page is filled, you can see the details in Connection to Distributor and Connection to Subscriber field. Click Next button.
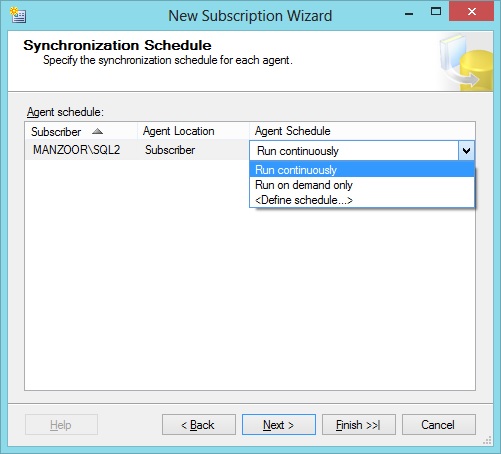
In next page we can select Agent Schedule as Run continuously or Run on demand only or we can define custom schedule. I have selected Run continuously and click Next button.
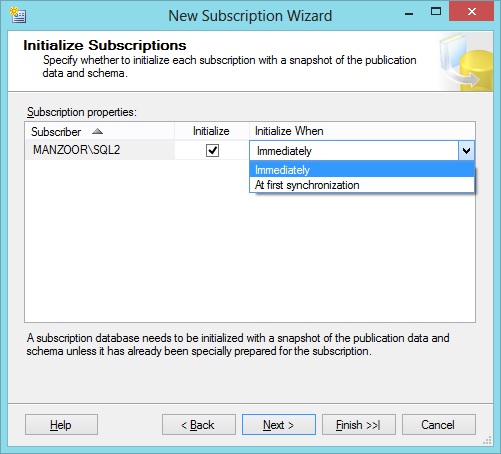
Now you can initialize subscription Immediately or At first synchronization as shown below. Click Next button.
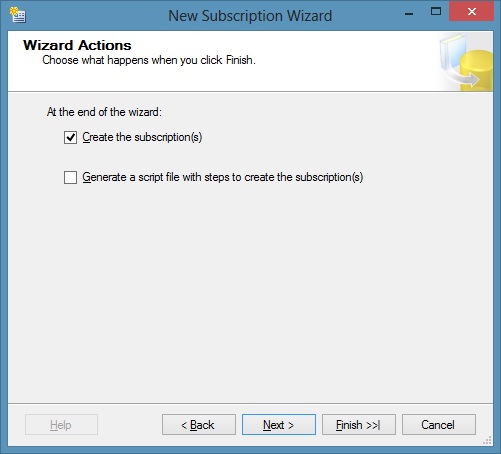
At the end of the wizard actions, choose to Create the subscription. If you want to generate the script for reference you can do the same by choosing that option too then click Next button.
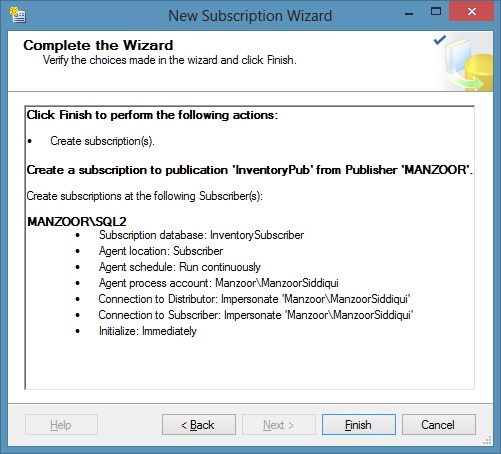
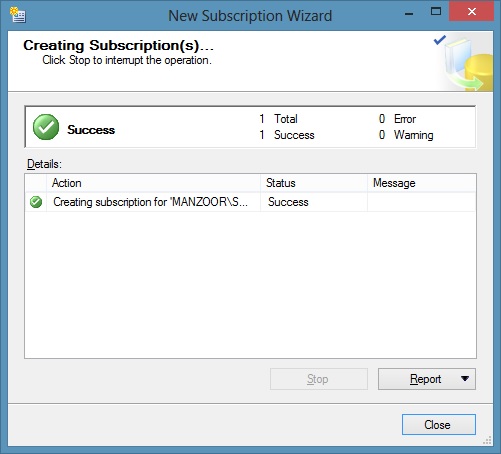
Before clicking Finish button, once verify all the choices which we have provided for creating subscription. Once you have verified, click Finish button to create subscription as shown below.
Finally, subscription is created and you can see the status as Success.
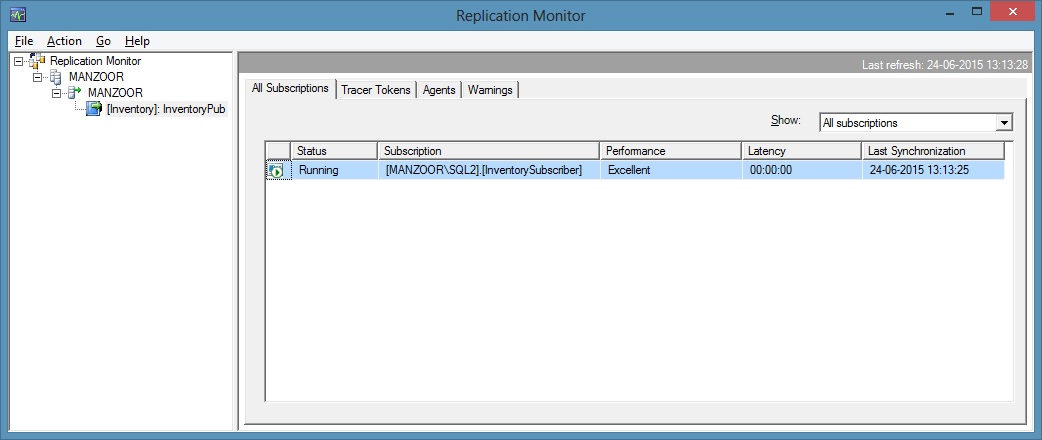
We have created distribution, publication and subscription. Now to check the transaction health and detail we will open Replication Monitor.
Replication Monitor is a tool that allows to check health of the replication, performance of replication, current status, latency of transaction and performance of publication and subscriptions etc.
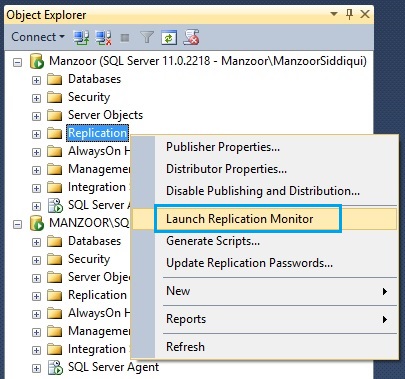
In Object Explorer, right click on Replication and select Launch Replication Monitor as shown in below screen.
Now our Transactional Replication is configured properly and successfully and we can check the details in Replication Monitor. Just for verification purpose to know how our replication working, you can insert some records in Inventory database in first server which is our publisher database and then select that record at subscriber database.
CLICK HERE to watch live practical.
Reference: Manzoor Siddiqui [www.SQLServerLog.com]
You may also like