Restore Database with SSMS and T-SQL in SQL Server

In previous article we have seen database backups and types, so in continuation to that we are going to discuss about how to restore database on same instance or different instance. We have already taken full backup and transaction log backup of ‘Inventory’ database. We will restore the database on different instance by SSMS and T-SQL.
We already have ‘Create Database’ permission on new instance. Now connect to SQL Server Management Studio and follow below steps to restore.
In Object Explorer, right click on Databases, and select Restore Database…
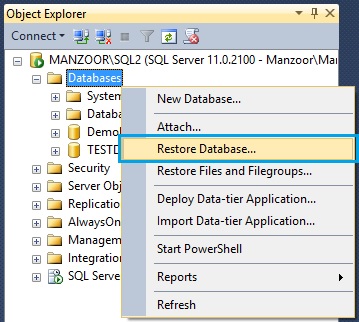
Figure 1: Restore Database option
Database Restore window will pop up where you can select backup device location in source and Add backup media from backup path and click OK. [refer Figure-2]
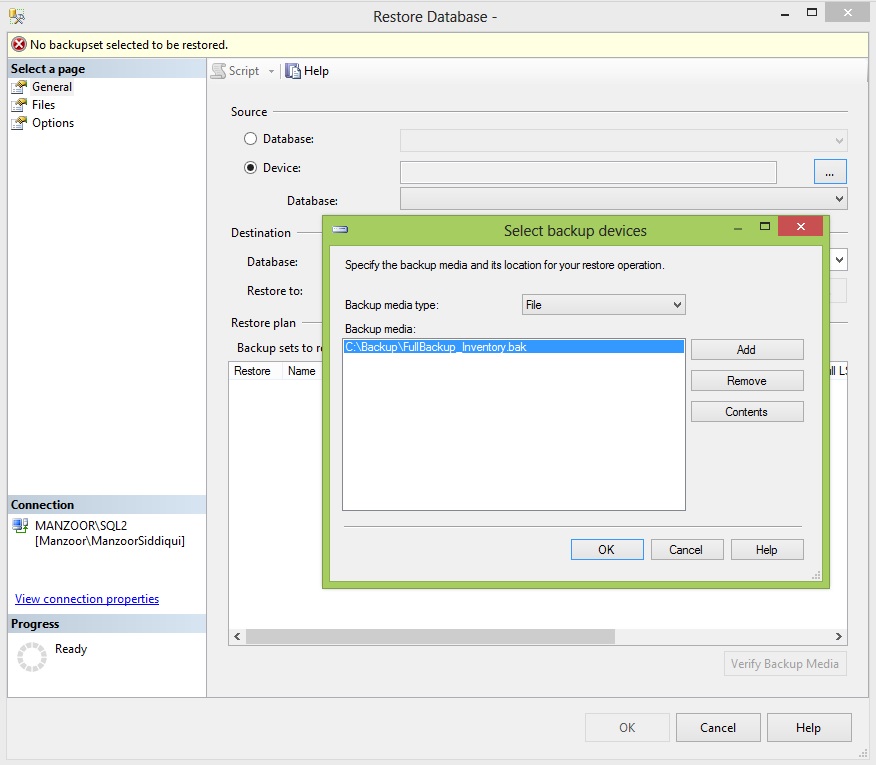
Figure 2: Backup File Selection to Restore
Once backup file is selected you can refer restore plan details like database type, server name, database name, first LSN, last LSN, size, user name etc.
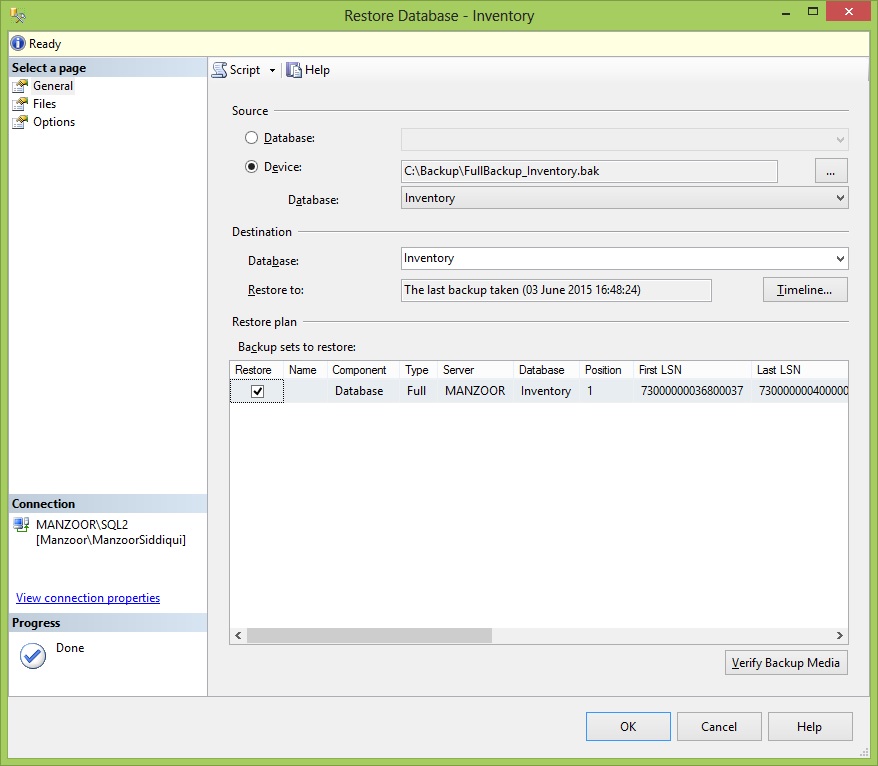
Figure 3: Restore General Page
Now go to Files in ‘Select a page’ section on left side of the window and you can change the restore path of master data file and log file in ‘Restore As’ navigation.
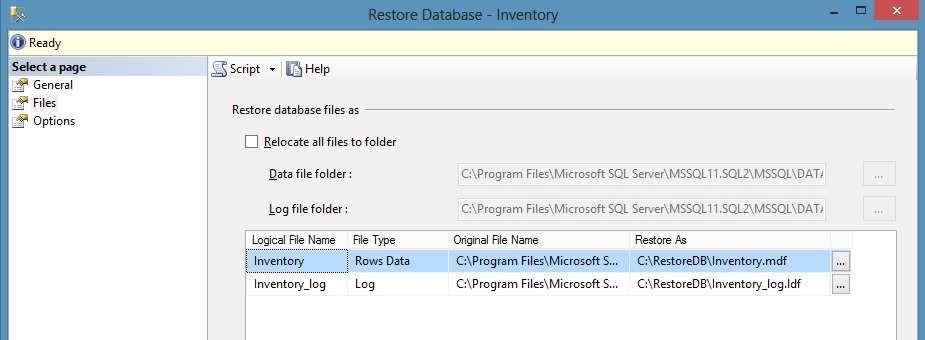
Figure 4: Restore Database File page
In Options page you have different choice to select as per your requirement and work scenario.
– Overwrite the existing database (WITH REPLACE)
– Preserve the replication settings (WITH KEEP_REPLICATION)
– Restrict access to the restored database (WITH RESTRICTED_USER)
In Options you can also select recovery state as per your recovery strategy. Recovery state has 3 types.
– RESTORE WITH RECOVERY: It is a default option, once restore is completed it makes the database online to work.
– RESTORE WITH NORECOVERY: It keeps the database in recovering state to restore more backup files, you cannot use database until it is fully recovered.
– RESTORE WITH STANDBY: It sets the database in read only mode.
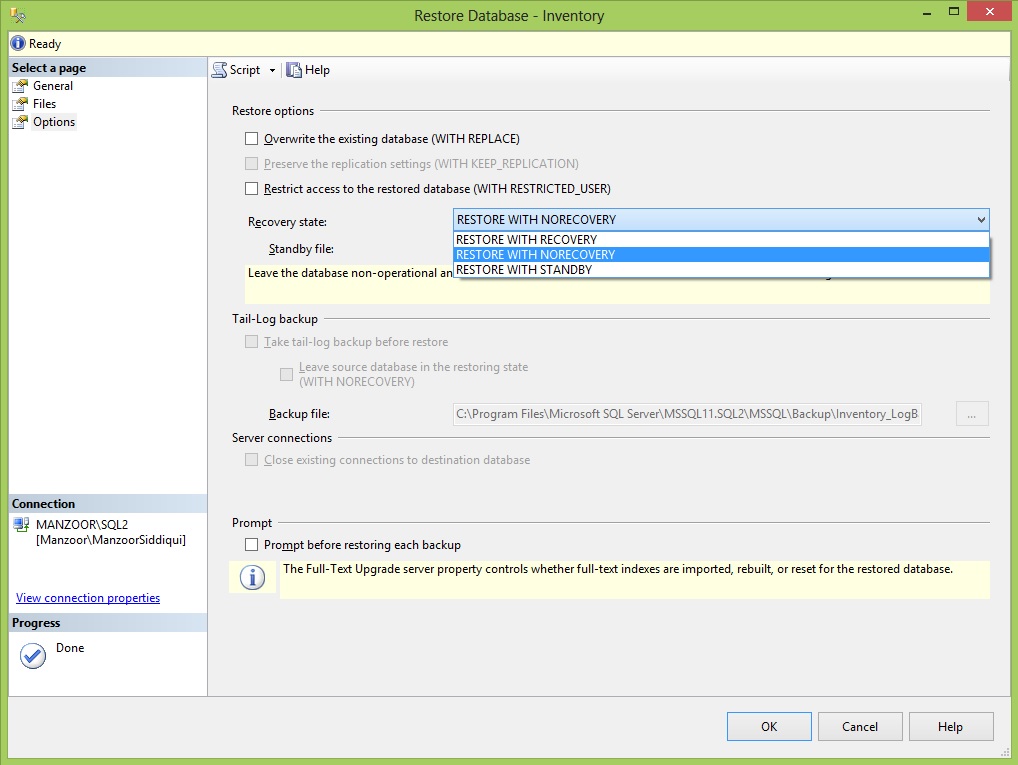
Figure 5: Restore Database Options page
As we have to restore transaction log also so we have kept database state in RESTORE WITH NORECOVERY.
Once you click OK button, restore operation will begin and you will get message Database ‘Inventory’ restored successfully.
Now refresh the database node and you can observe that database is in ‘Inventory (Restoring…)‘ state as shown below.
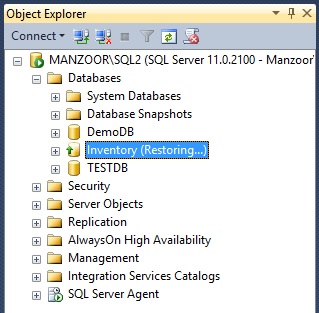
Figure 6: Database Restoring State
Now we will restore transaction log WITH RECOVERY state so that once restore is completed, database will be online and ready to use.
To restore transaction log, right click on Inventory database, navigate to Tasks –> Restore and click Transaction Log…
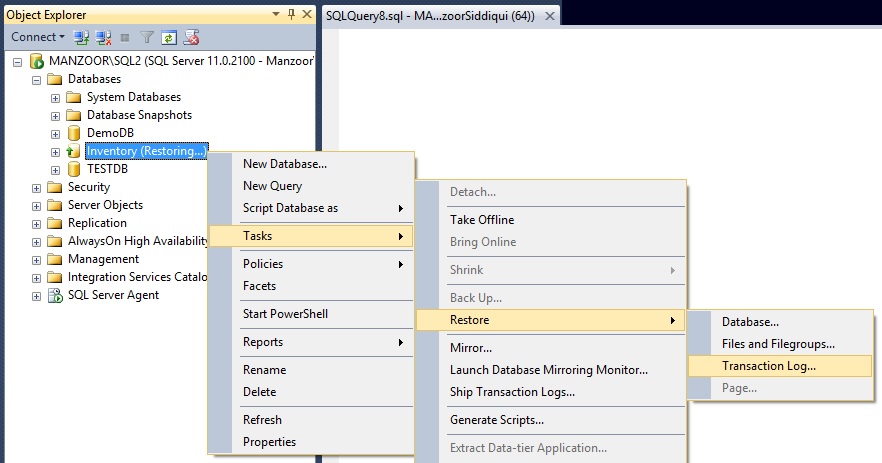
Figure 7: Restore Transaction Log
Now choose From file or tape option and add your transaction log file from backup path. By default point in time is selected, then go to Options page and select recovery state as RESTORE WITH RECOVERY and click OK. Once restore is completed you will get successful message as shown below and database is online and ready to use.
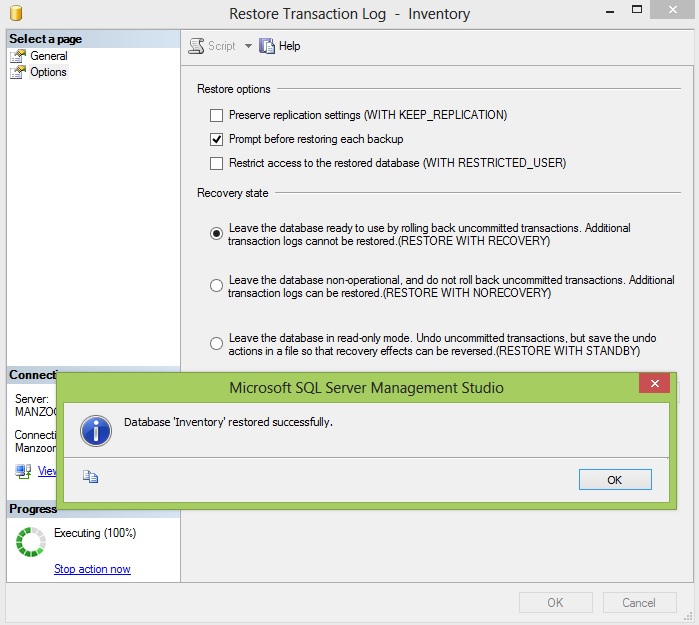
Figure 8: Restore Completed
Now we will do the restore process of full backup and transaction log backup of database with T_SQL.
First of all check the logical name of database backup copy to restore with RESTORE FILELISTONLY. [refer Figure-9]
--Check Logical Name of Database
RESTORE FILELISTONLY
FROM DISK = 'C:\Backup\FullBackup_Inventory.bak'

Figure 9: Check Logical Name of Database
Now restore the Inventory database with NORECOVERY as follows. Once restore is successfully completed you will get details in message pane. [refer Figure-10]
--Restore Database Inventory with NORECOVERY
USE [master]
RESTORE DATABASE [Inventory] FROM DISK = N'C:\Backup\FullBackup_Inventory.bak' WITH FILE = 1,
MOVE N'Inventory' TO N'C:\RestoreDB\Inventory.mdf',
MOVE N'Inventory_log' TO N'C:\RestoreDB\Inventory_Log.ldf',
NORECOVERY, NOUNLOAD, STATS = 5
GO
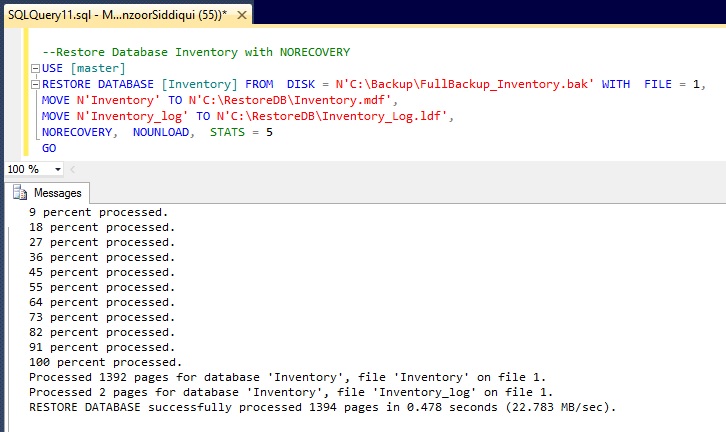
Figure 10: Restore Database WITH NORECOVERY
Then restore transaction log with RESTORE LOG command as given below.
--Restore Transaction Log with RECOVERY
RESTORE LOG [Inventory] FROM DISK = N'C:\Backup\TranLog_Backup_Inventory.trn'
WITH FILE = 1, NOUNLOAD, STATS = 10
GO
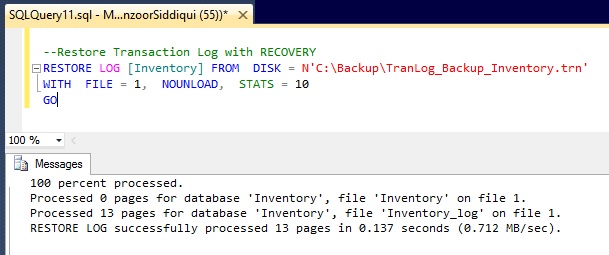
Figure 11: Restore Log WITH RECOVERY
Once all files have restored you make sure that your database is ONLINE and in MULTI_USER state. You can check the same with below query. [refer Figure-12]
--Check Database Status
SELECT name, user_access_desc, state_desc, recovery_model_desc FROM sys.databases
WHERE name = 'Inventory'
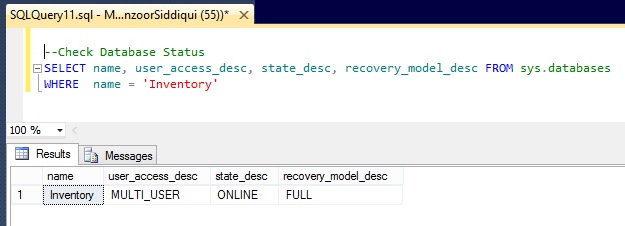
Figure 12: Check Restored Database Status
Our ‘Inventory’ database is now restored completely and ready to use.
CLICK HERE to watch live practical.
Reference: Manzoor Siddiqui [www.SQLServerLog.com]
You may also like